
Option 1:
Duplicate the image you are using, save the original if you need it and “optimize” the copy.
Rename the copy to a suitable name(no spaces or Caps), then open it in Preview on mac (or similar software on PC).
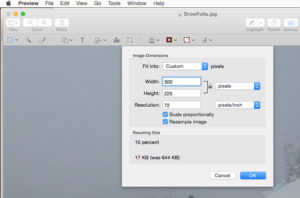
Select Adjust Size from the Tool Menu:
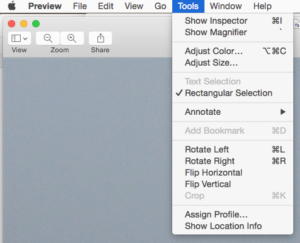
Then with both blue boxes clicked, and the dropdown next to width & height set to “pixels”, set the largest edge of your image to 1024 (the other will change automatically in proportion).
Make sure the resolution is set to 72.
Save image–it is now ready to upload to your post.
Option 2:
You can also use the drag tool (dashed square) in Preview to crop an image–the crop dimensions will show as you drag. If you let go, you can also pull one side, or top or bottom of crop box to adjust.
Just make sure the longest side is maximum 1024 px (if it’s a tall image, then 1024 is the height, for a wide image, 1024 px is the width).
Also be sure you “adjust size” and make sure resolution is 72.
You must be logged in to post a comment.