Follow these steps to get a [Client] website up an running quickly with maximum functionality.
If you keep track of and document your process, you can tell the story of this site in your own Portfolio!!! Before/after photo sliders are easy in WordPress…so get before/after images!!
Create
- Home Page
- Posts Page
Using “Quick Edit” from the All Posts are, be sure the “slugs” for each page are correct. ie they are “home” and “posts”, NOT “home-3” or “post-yourname” or whatever else they might have been called if you made a previous Page with an unusual title. Page Names/slugs CAN be changed, as long as there is not already a post/page with that same name. (in which case change THAT name, then return to your preferred page and update that name/slug).
You will use these to make a custom Home page–rather than having a blog of all your posts be the default home page.
Remove
If you did a deluxe install or an auto install of WordPress, you will get some extra potentially conflicting, and certainly confusing plug-ins and functions, as Dreamhost gives you a free page builder called BOLD GRID. Like Elementor, it is a page builder, but not quite as useful for our purposes. So IF you installed these by accident, you should remove them. Do this by 1) first deactivate the plugin. 2) Once you are sure they are the right ones, you can delete them. Deactivation should prevent conflicts, but you’ll want a CLEAN site without extras, so in the long term they should be removed if not used.
Go to the Plug-ins area and remove any BOLDGRID plugins. That will be all plugins [except Total Upkeep–a backup plugin] that list the creator as boldgrid, such as:
- Bold Grid …
- Post and Page Builder.. by boldgrid
- Optinmonster
- Hello Dolly
- I will add to this list if I can recall all of them…
Add
Go to the Plug-ins area and Add New. You can type the following names (or part of them) in the search area to pull up the plugin you want. Install, then Activate each plugin.
- Elementor
- Essential Add-Ons for Elementor
- Premium Add Ons for Elementor
- Starter Templates
- Classic Editor
And if you dont already have these:
- Total Upkeep
- WP-Forms Lite
Install Themes
Install the Following two themes–both are highly configurable and work with starter templates, with minor difference listed below; Install both, but Activate ONLY one:
- Astra–has better templates
- Generate Press–is a bit more configurable
Adjust
Go to the Settings are in the Dashboard and adjust all the following settings [click on each image for larger view]:
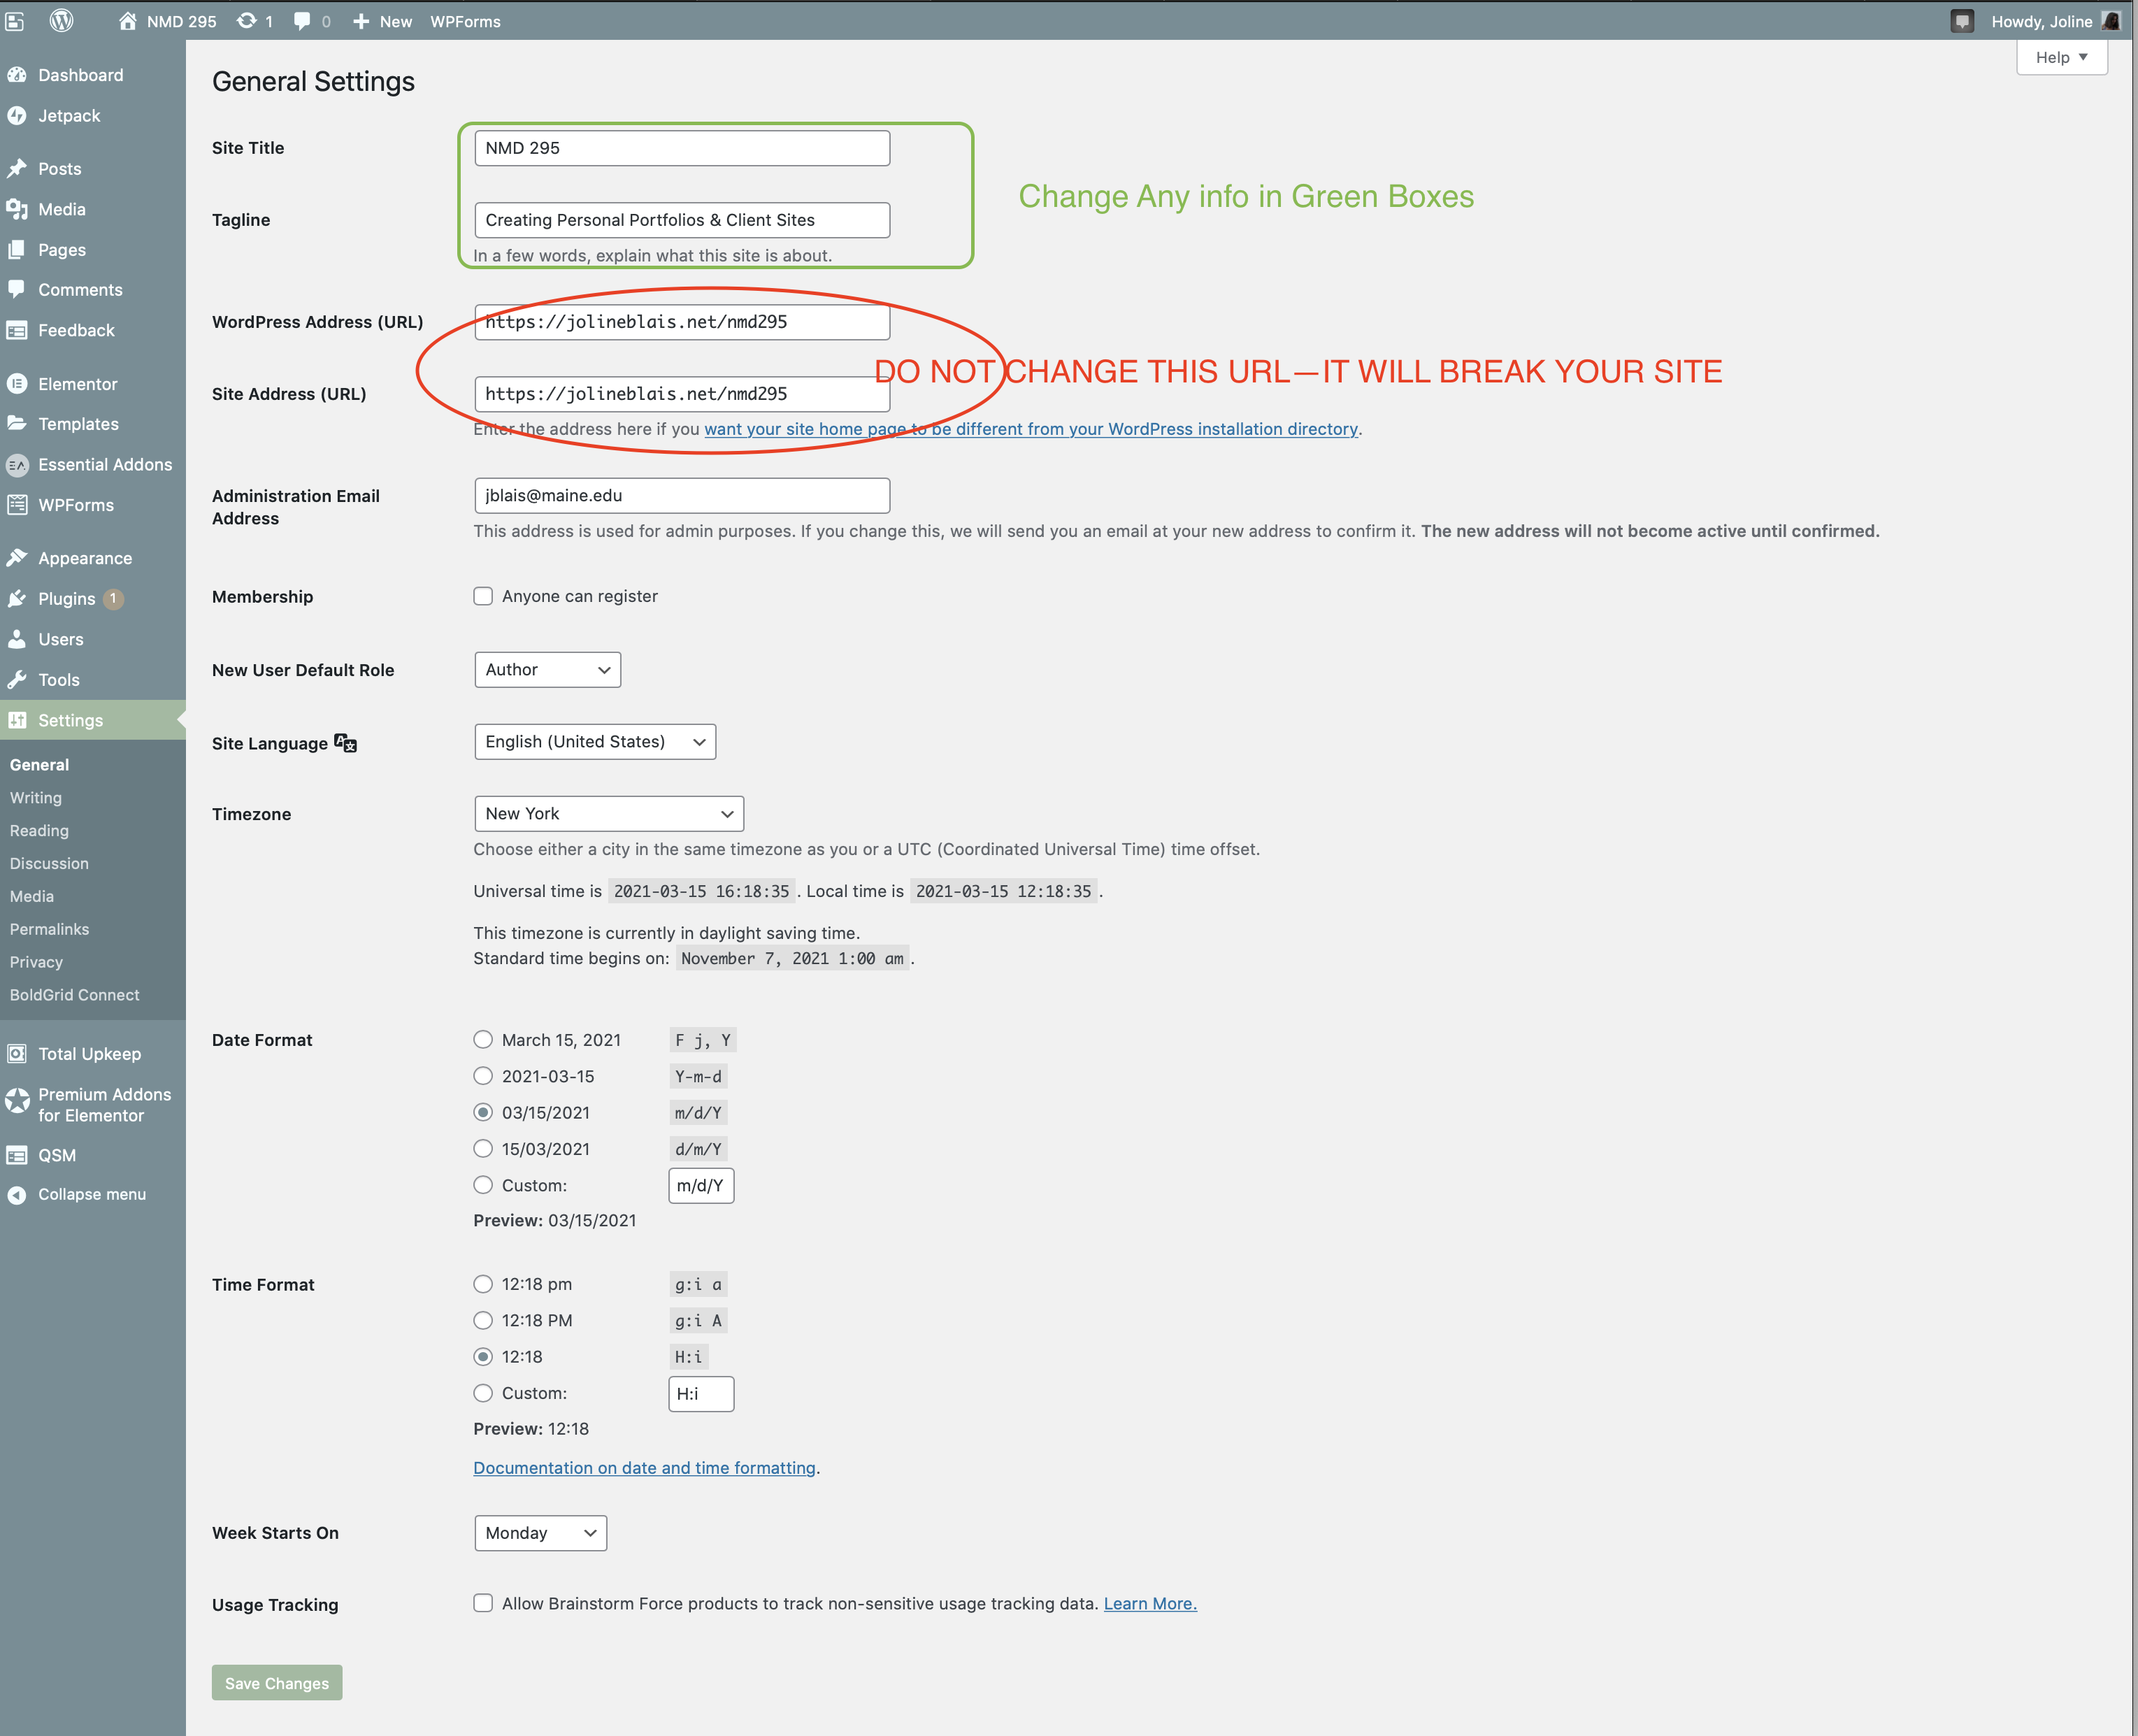

- General–>Site Title, Tagline
- Writing–> Allow Users to switch editors=yes
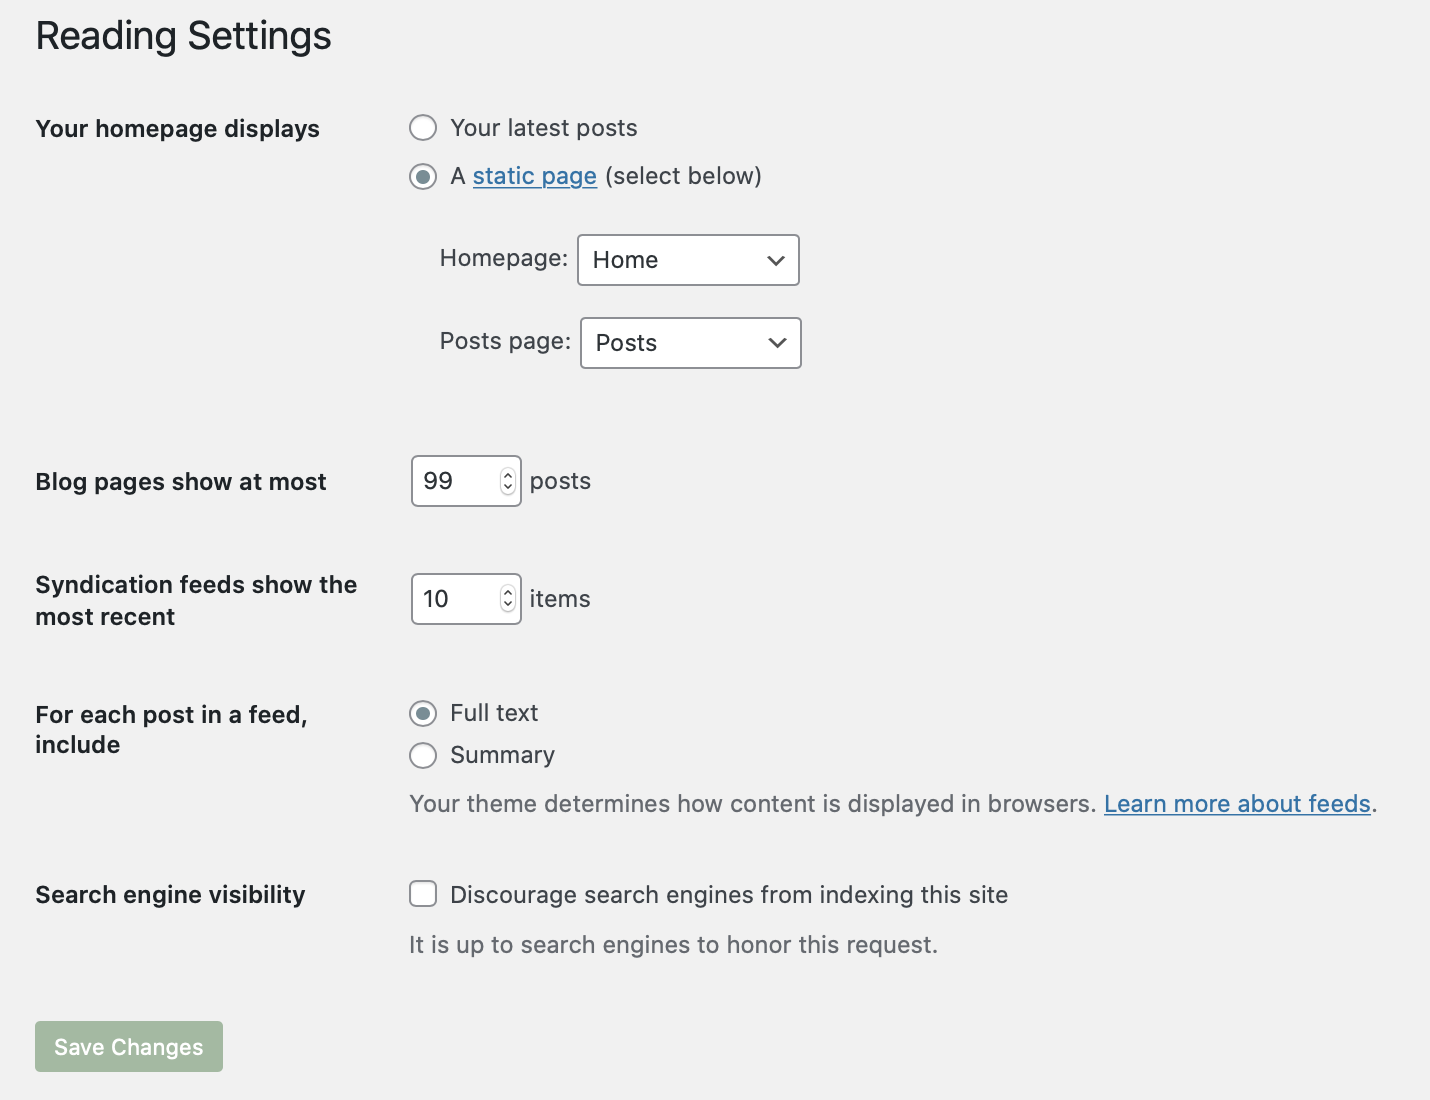
- Reading–>Homepage set to Static Page–> Home; Post page set to Posts
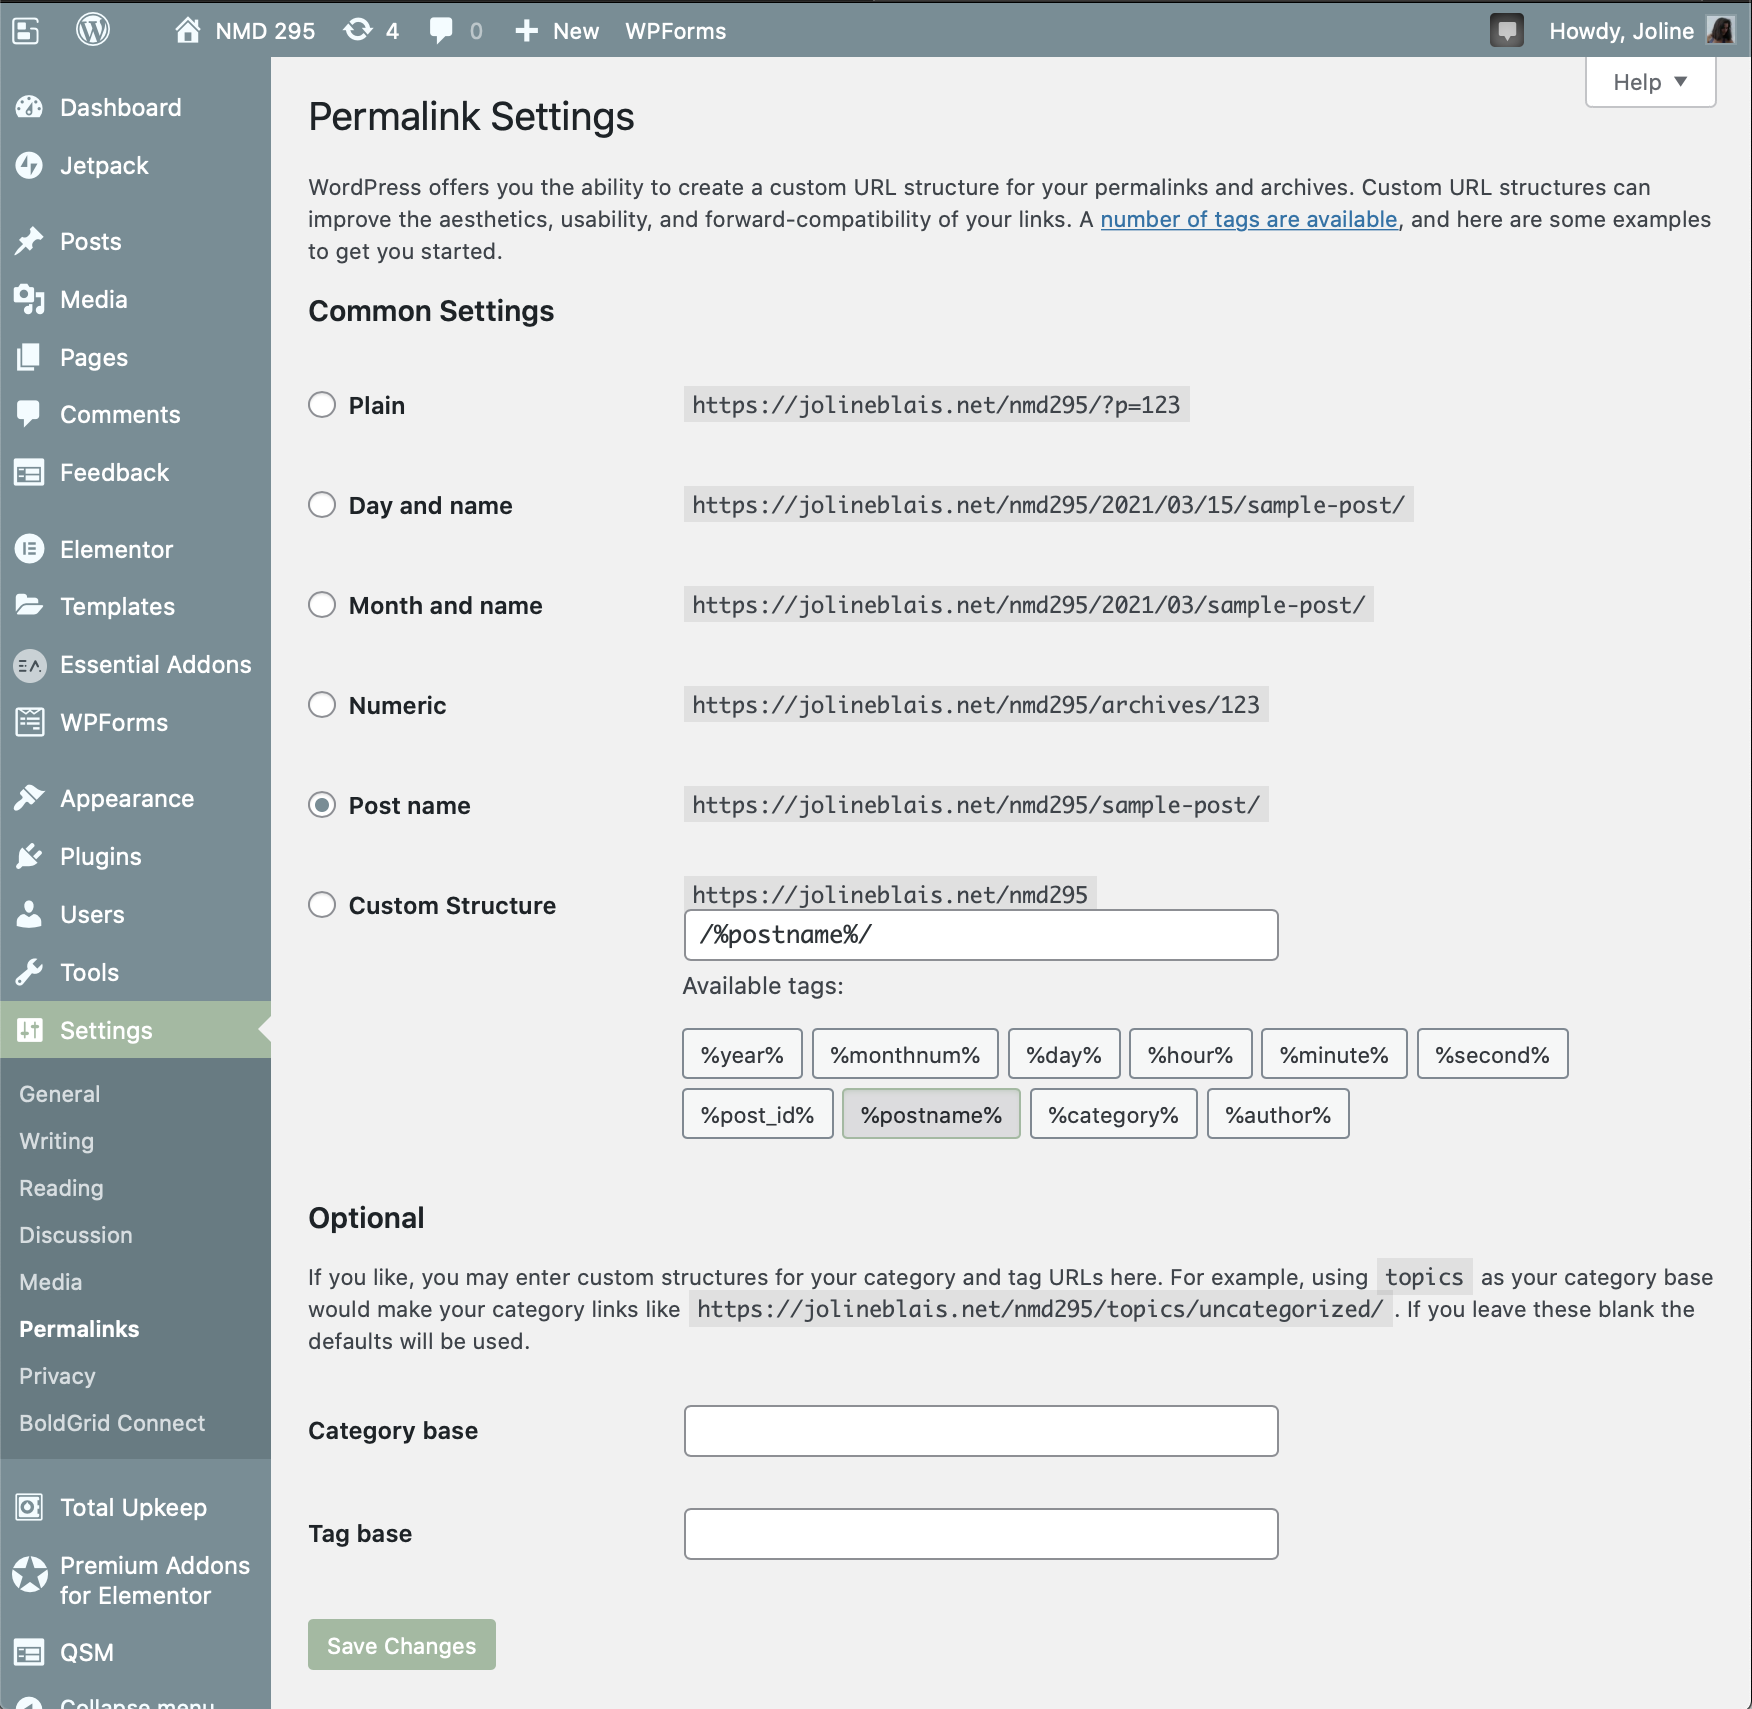
- Permalinks–> set to Post Name This makes sure the title of your post matches the URL for the post–very helpful for readers to keep track of their navigation on your site.
Layout
For super fast site build for a NEW site, and possibly some new sites…Use Starter Templates to import a whole site. This will import 3-6 pages for you, and you can then customize the menu, and use whichever pages you want (you can re-name, duplicate and copy pages). The pages that are unused will NOT show up if you do not have a link or menu item that links to them. So they stay invisible. They can be deleted when site is complete if no longer needed.
In Dashboard, go to Appearance–>Starter Templates. If prompted, select Elementor [if not, it may already be set]. Then, select ALL–>Free in the dropdown to get only free templates. Then scroll down page to find a suitable template. Click on it to see ALL the pages in the template. You can click on each page to view it. If you want 1 page, save & install that one; If you want ALL the pages, you can select “Import/Save” Entire Site.
Then 1) view the site, 2) go see the pages in the dashboard in Pages–>All pages, so you can see each page, 3)Create a new menu so you can configure it, and set in as your primary menu, 4) now go customize any and all pages that would work for your client.
This is a quick way to show client a “look” for a site. If each of you has a client WordPress site; you could create 3 options, and send your client all three URLs to view alt designs…
Now comes all of the heavy lifting…
Customize
Start with the following Site-wide setting that you access from Elementor on your Home Page:
- Home Page; in Elementor, use the upper left hamburger menu to find Site Settings–> Global Fonts, and Global Colors, and SET your color palettes for your theme–You will use these everywhere with Elementor!! Use the W3schools color picker to find the right 6 digit hex color, like #000000. And check out these Color Palettes
- Home Page in Elementor, Page settings gear in lower left corner: Decide which page layout you want: Default, Elementor, Elementor Canvas, Theme.
- Theme Customize settings, under Appearance–>Customize. You do not need to do all of these at this time, just the ones that you know.
Content
If your client has a previous WordPress site, you can ask them to export all their data from their dashboard. You can do a screen share with them and walk them through it, like we did for your WordPress.com sites…
If not, you will need to get the content from your client–text, images, video etc.
Reiterate Layout/Content/Tweaking until you get a coherent, functional, beautiful, content rich site!!
You must be logged in to post a comment.